Best DIY Home Energy Kits: What to Look For
A practical guide to choosing a DIY home energy kit — what's inside, what it costs, and how it compares to hiring a pro.
A practical guide to choosing a DIY home energy kit, what's inside, what it costs, and how it compares to hiring a pro.
If your energy bill keeps creeping up, a DIY home energy kit is one of the cheapest ways to find out why — and to start fixing it without waiting weeks for a contractor. But "DIY energy kit" can mean two very different things, and the difference matters for what you'll actually get. This guide walks through what comes in a kit, whether they're worth it, how hard the work really is, and how the costs stack up against hiring a professional.
What comes in a DIY energy efficiency kit?
There are two kinds of "DIY energy kits," and it's worth knowing which one you're buying:
- Assessment kits diagnose your home — they tell you where energy is leaking and what to fix first. This is what the HomeBoost DIY Kit is.
- Materials kits give you the supplies to make fixes, like weather stripping, caulk, and LED bulbs.
The smartest approach is to assess first, then fix, so you spend money on the upgrades that will actually move your bill. Here's exactly what HomeBoost sends you.
Inside the HomeBoost DIY Kit
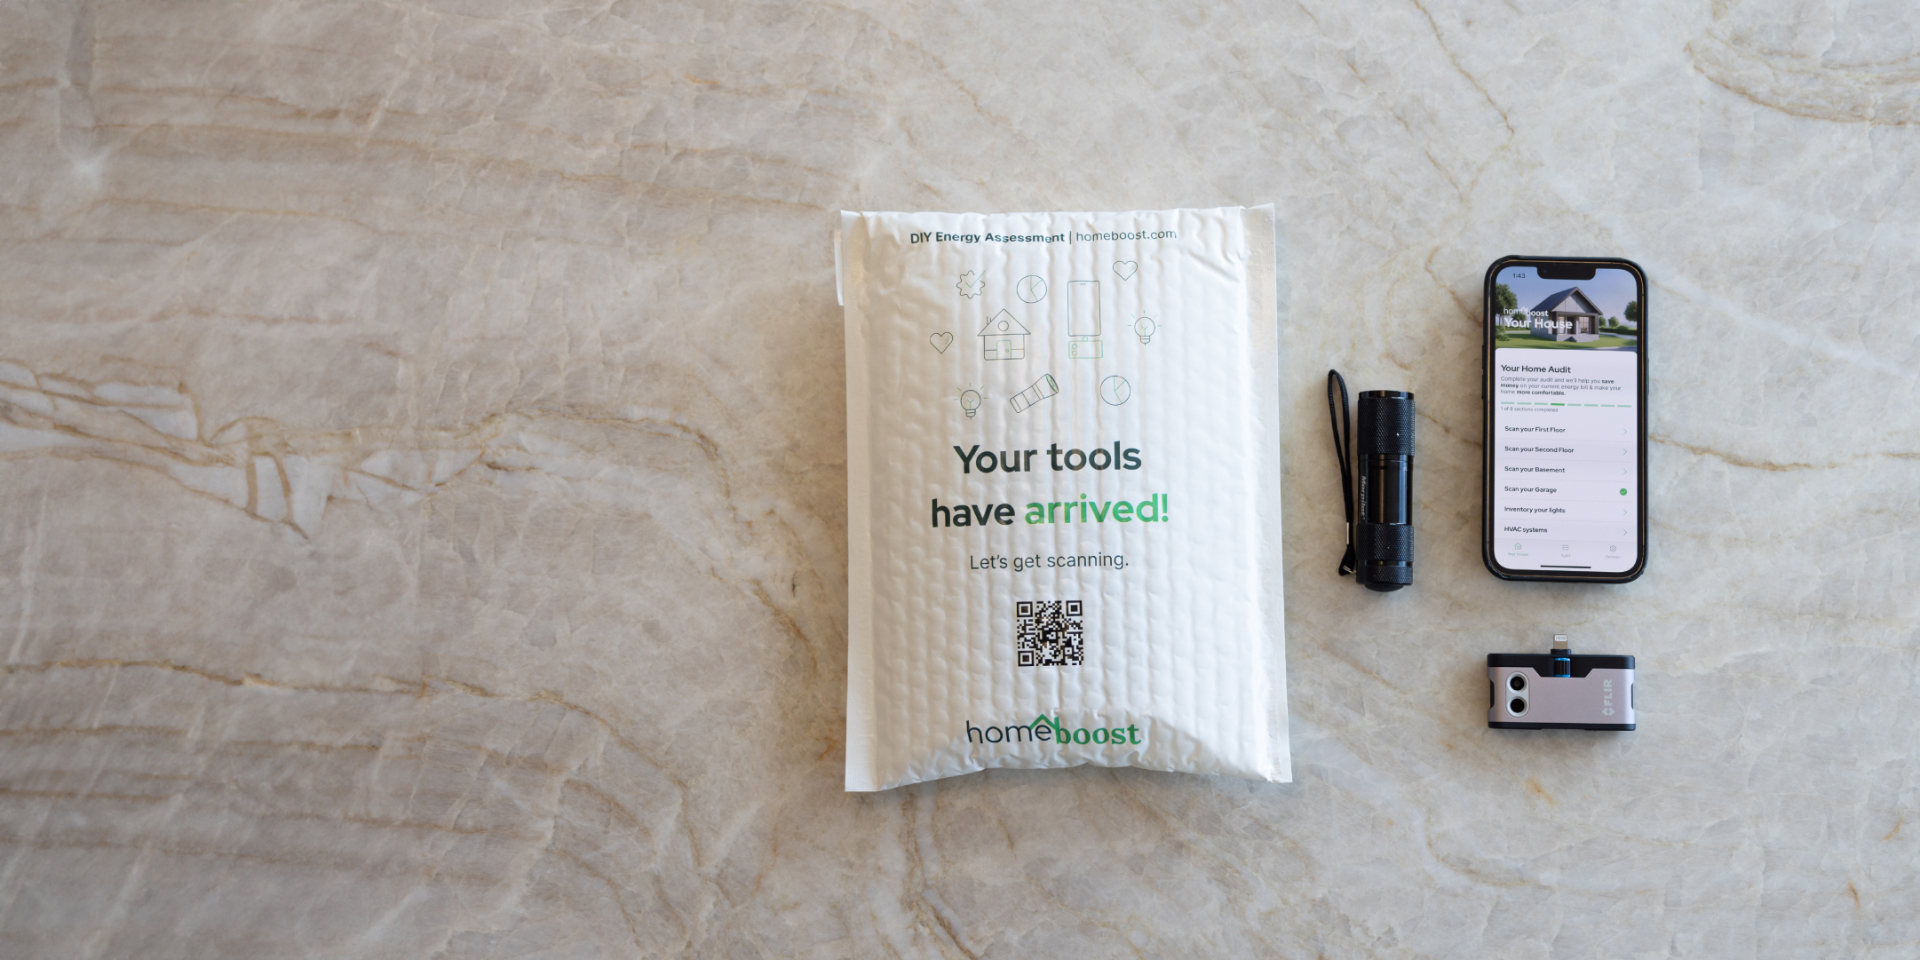
The HomeBoost DIY Kit is a mail-order kit that lends you professional diagnostic tools. It includes:
- FLIR thermal camera — reveals cold spots, drafts, and missing insulation you can't see with the naked eye
- Blacklight — helps spot air-leak indicators and moisture issues around the home
- Step-by-step guide — walks you through each scan so you don't miss anything
- Charging cables — everything needed to power the equipment
- Prepaid return envelope — ship the tools back for free when you're done
- Unlimited HomeBoost app access — guides you to scan appliances, HVAC, water heater, insulation, and leaks
- A personalized energy report — reviewed by real BPI-certified energy professionals, factoring in your scans, local weather, and utility bills
The report doesn't just list problems. It gives clear, prioritized next steps, including which fixes you can do yourself and when it's worth calling a contractor.
Note: The HomeBoost DIY Kit tools are a loan. You have 30 days to return them in the prepaid envelope; keep them past that and a $200 purchase fee applies.
Common materials a report will point you toward
Once your report is in hand, most homeowners tackle a short list of high-impact, low-cost fixes. A typical DIY materials list looks like:
- Weather stripping for drafty doors and windows
- Foam sealant and caulk to air-seal gaps, cracks, and penetrations
- LED bulbs to cut lighting energy use immediately
- A smart thermostat to automate heating and cooling savings
Are DIY energy kits worth it?
For most homeowners, yes — especially an assessment kit. A professional home energy audit averages $437 and runs as high as $698 or more. The HomeBoost DIY Kit costs $99, and because the tools are a refundable loan, you're really paying for the expert-reviewed report rather than equipment you'll never use again.
Here's how the two approaches compare:
| HomeBoost DIY Kit | Traditional Pro Audit | |
|---|---|---|
| Upfront cost | $99 (tools are a refundable loan) | $437 average ($212–$698) |
| Net cost if tools returned | $99, minus any utility rebate | $437 average |
| Who reviews it | BPI-certified energy pros | On-site auditor |
| Time on site | ~15–30 min, on your schedule | 2–4 hrs, by appointment |
| Report | Personalized, with DIY + contractor next steps | Varies by provider |
| Guarantee | 30-day money-back | Typically none |
The fixes a report uncovers tend to pay for themselves quickly. HomeBoost reports homeowners commonly uncover up to $1,200 in hidden annual energy savings. Add the fact that you can claim a federal tax credit of 30% of a home energy audit's cost (up to $150), and the math gets even friendlier.
When a kit may not be worth it: if you suspect a major problem like a failing HVAC system or significant moisture damage, you'll likely need a contractor regardless. The good news is the HomeBoost DIY Kit report tells you when that's the case, so you're not guessing.
What is the best DIY home energy kit?
The best kit is the one that tells you what to fix and is reviewed by actual experts — not just a bag of supplies. When comparing options, look for:
- Real diagnostic tools, like a thermal camera, not just a checklist
- Expert review by certified professionals (BPI certification is the gold standard)
- A personalized, prioritized report tied to your home, weather, and utility bills
- Low financial risk — a money-back guarantee and refundable equipment
- Clear next steps that separate easy DIY wins from jobs that need a pro
The HomeBoost DIY Kit checks every box: pro-grade FLIR thermal imaging, BPI-certified reviewers, a tailored report, a 30-day money-back guarantee, free shipping, and prepaid returns — all for $99. It's built specifically to turn a confusing energy bill into a short, ranked to-do list.
How hard is it to install a DIY energy kit?
Using the HomeBoost DIY Kit itself is genuinely easy: the app guides each scan and most people finish in about 15 to 30 minutes. No tools, no wiring, no mess — you just point the thermal camera where the app tells you and tap "Ready for Review."
The fixes that follow range from "anyone can do this" to "moderate weekend project." Here's an honest difficulty rating for the most common upgrades, alongside DIY versus contractor costs:
| Upgrade | Difficulty | DIY cost | Contractor cost |
|---|---|---|---|
| LED bulb swap | Very easy | $2–$8 per bulb, no labor | Rarely hired; mostly labor markup |
| Weather stripping (doors/windows) | Easy | $10–$40 per door or window in materials | $35–$90 per door + labor; ~$284 avg job |
| Air sealing with foam/caulk | Easy–Moderate | $100–$350 in materials | $500–$2,500 (avg $1,000–$1,500) |
| Smart thermostat | Moderate | $50–$250 unit, no labor | $200–$500 installed (avg $350) |
A closer look at each task
LED bulbs — Very easy. If you can change a lightbulb, you're done. No tools, a few dollars each, instant savings.
Weather stripping — Easy. Peel-and-stick foam tape or door sweeps take 1–2 hours total. Materials run $10–$40 per opening. A pro charges $35–$90 per door plus labor, with the average job around $284 — so this is one of the clearest DIY wins.
Foam sealant and caulk — Easy to moderate. Sealing gaps around outlets, pipes, and rim joists takes patience more than skill. DIY materials cost $100–$350; hiring out a whole-home air-sealing job runs $500–$2,500 (averaging $1,000–$1,500).
Smart thermostat — Moderate. Most swaps take 30–60 minutes, but you're working with low-voltage wiring. The main catch is the "C-wire" (common wire); if your system lacks one, installation gets trickier and a pro may be worth the $200–$500. If you're not comfortable with wiring, this is the one task on the list most people hand off.
The bottom line
A good DIY energy kit pays for itself by aiming your money at the right fixes. Start with an assessment so you're not guessing, knock out the easy wins like LED bulbs and weather stripping yourself, and call a contractor only where it genuinely makes sense. The HomeBoost DIY Kit gives you pro-grade diagnostics and an expert-reviewed plan for $99, with the tools fully refundable and a 30-day money-back guarantee.
Ready to find your hidden savings?
Get your HomeBoost DIY Kit and see what's driving your energy bill in about 30 minutes. Order the HomeBoost DIY Kit →
Sources & cost references
- HomeBoost DIY Kit product page (kit contents & $99 price)
- HomeAdvisor — home energy audit cost
- HomeAdvisor — weather stripping installation cost
- Angi — smart thermostat installation cost